
ESL: Ch 10. Boosting and Additive Trees
Contents
10.1 Boosting Methods
10.2 Boosting Fits an Additive Model
10.3 Forward Stagewise Additive Modeling
10.4 Exponential Loss and AdaBoost
10.5 Why Exponential Loss?
10.6 Loss Functions and Robustness
10.7 “Off-the-Shelf” Procedures for Data Mining
10.8 Example: Spam Data
10.9 Boosting Trees
10.10 Numerical Optimization via Gradient Boosting
10.11 Right-Sized Trees for Boosting
10.12 Regularization
10.13 Interpretation
10.14 Illustrations
10.1 Boosting Methods
Boosting은 지난 20년간 등장한 통계적 학습 모형 중 가장 강력한 모형 중 하나로 꼽힌다. Boosting은 성능이 좋지 않은 “weak” classifier/regression model를 반복적, 혹은 연쇄적으로 수행하여 더 좋은 성능의 classifier/regression model을 만드는 기법이다. Weak classifier들의 output을 이용하여 하나의 강력한 output을 만든다는 측면에서는 앞 장에서 소개한 bagging 등 다른 committee-based 접근과 공통점이 있지만, boosting은 근본적으로 이들과 매우 다른 모형이다. 이 Chapter는 다음과 같은 순서로 boosting에 대한 내용 전반을 다룬다.
- 10.1에서는 가장 잘 알려진 boosting 방법 중 하나인 AdaBoost.M1에 대해 소개한다.
- 10.2 ~ 10.4는 AdaBoost.M1이 exponential loss를 loss function으로 사용한 additive model와 equivalent하다는 것을 설명한다.
- 10.5에서는 이 exponential loss와 binomial 분포의 negative log-likelihood loss function 간의 관계를 소개한다.
- 10.6은 squared error loss, exponential loss 등 loss function들의 특징을 소개한다. 그리고 보다 robust한 특징을 갖는 loss를 소개한다.
- 10.7은 여러가지 “Off-the-shelf” 통계 학습 기법을 비교하며, 왜 decision tree가 boosting을 위한 base learner로 이상적인지 설명한다.
- 10.9는 decision tree를 base learner로 한 일반적인 boosting에 대해 소개하며, 특정 loss(exponential, squared error)의 경우를 제외하고는 boosted model을 실제로 계산하는 빠른 algorithm이 없다는 한계점에 대해 설명한다.
- 10.10은 위 한계를 극복하고, 미분가능한 임의의 loss function에 대해 적용가능한 Gradient Boosting에 대해 설명한다.
- 10.11 ~ 10.14는 Base learner tree의 size, regularization, gradient boosting의 결과를 해석하는 방법, 그리고 gradient boosting을 실제 데이터에 적용한 분석 사례에 대해 소개한다.
AdaBoost.M1
AdaBoost.M1은 가장 잘 알려진 boosting 방법 중 하나로서, Freund and Schapire (1997)에서 처음 소개된 모형이다. 반응변수가 ${ -1,1 }$의 값을 갖는 two-class problem을 생각해보자. 예측변수의 벡터 $X$에 대해 classifier $G(X)$는 ${ -1,1 }$ 중 하나의 값을 예측값으로 반환한다. Training sample에 대한 error rate은 다음과 같다.
\[\overline{\text{err}}=\frac{1}{N} \sum_{i=1}^{N} I(y_i \neq G(x_i))\]그리고 future prediction에 대한 expected error rate은 $\mathbb E_{XY} I(Y \neq G(X))$이다. “Weak” classifier란 error rate이 random guessing보다 아주 조금 작은 classifier를 말한다. Two-class problem인 이 문제의 경우에는 random guessing으로 예측했을 때 평균적으로 반을 틀릴 것이므로, weak classifier의 error rate은 $0.5$보다 조금 더 작다. AdaBoost.M1은 이러한 weak classifier를 연쇄적으로 적용하며, 한 weak classifier가 적용될 때마다 training data를 조정한다.(사실 정확히는 각 training data에 대한 weight를 조정하는 것이지만 자세한 것은 뒤에 가서 확인하자.) 그 결과 우리는 연쇄적으로 적용된 weak classifier의 sequence, $G_1(x),G_2(x),\cdots,G_M(x)$를 얻으며, 반응변수에 대한 최종 prediction은 weak classifier들에 각각 가중치가 부여된 weighted majority voting을 통해 이루어진다.
\[G(x)=\text{sign}\Big( \sum_{m=1}^{M} \alpha_m G_m(x) \Big)\]여기서 $\alpha_1,\cdots, \alpha_M$은 각 weak classifier가 최종 예측에 영향을 끼치는 weight 역할을 한다. 이는 예측의 성능이 더 좋았던 weak classifier의 예측결과를 최종 예측결과에 더 많이 반영해주는 역할을 한다. 다음 그림은 AdaBoost.M1의 예측 과정을 요약한 그림이다.

Algorithm
다음은 AdaBoost.M1이 수행하는 알고리즘이다. 한 단계 한 단계가 어떤 작업을 수행하고 무엇을 의미하는지 자세히 살펴보겠다.

1. Initialization
먼저 각 observation의 weight인 $w_i$를 $w_i=\frac{1}{N} \text{ for all }i$로 초기값을 부여해준다. 각 trainig example, $(x_1,y_1),\cdots,(x_N,y_N)$에 부여되는 observation weight $w_i$는 AdaBoost.M1에서 어떤 역할을 할까?
\[w_1 = \text{Observation weight of } (x_1,y_1)\] \[\vdots\] \[w_N = \text{Observation weight of } (x_N,y_N)\]2번 과정의 매 iteration($m=1,\cdots,M$)마다 우리는 이 observation weight들을 반영하여, 더 높은 weight를 갖는 observation이 $G_m(x)$의 예측에 더 큰 영향을 끼치도록 각 weak classifier $G_m(x)$를 학습시킬 것이다. 또한 매 iteration의 마지막에서 이 observation weight, $w_1,\cdots,w_N$의 값은 각각 따로따로 업데이트되어, 다음 iteration은 이전 기와는 다른 weight로 모형을 학습하게 된다.
2.(a) Fitting of Weak Classifiers, $G_m(x)$
$m$th iteration을 수행하는 것을 기준으로 설명하겠다. 먼저 2.(a)에서처럼, $m-1$th iteration에서 업데이트된 각 observation의 weight, $w_i$를 반영하여 weak classifier, $G_m(x)$를 학습한다. 그런데 Observation weight를 반영하여 classifier를 학습한다는 것은 어떤 의미일까? Boosting은 주로 decision tree에 적용되므로, CART 알고리즘을 사용한 classification tree의 학습 과정에 observation weight를 반영하는 예시를 소개하겠다.
Example: Fitting Classification Tree with Observation Weights
CART 알고리즘을 이용하여 반응변수가 $1,2,\cdots,K$인 classification tree를 학습하는 예시를 생각해보자. (이 예시의 $m=1,2,\cdots,M$은 AdaBoost.M1의 iteration의 index가 아닌, classification tree의 각 partition의 index를 의미한다.) 만약 input space를 나누는 partition $R_1,\cdots,R_M$이 존재한다고 하자. 각 partition $R_m$ 내에서는 먼저, partition $R_m$ 내의 각 class $1,2,\cdots,K$의 비율을 나타내는 $\hat{p_k}(R_m)$를 계산한다. 그리고 partition $R_m$ 내에서 가장 $\hat{p_k}(R_m)$가 큰 class, $c_m$을 partition $R_m$의 classification 결과로 반환한다.
\[\hat{p_k}(R_m)=\frac{1}{N_m}\sum_{x_i \in R_m} I(y_i=k) \enspace \text{ , } k=1,\cdots,K\] \[c_m = \underset{k=1,\cdots,K}{\operatorname{argmax}} \hat{p_k}(R_m)\]이 때 partition $R_1,\cdots,R_M$을 갖는 classification tree는 다음과 같이 나타낼 수 있다.
\[f(x)=\sum_{m=1}^{M} c_m I(x \in R_m)\]CART 알고리즘은 다음과 같은 greedy한 방법으로 최적 partition, $R_1,\cdots,R_M$을 찾는다. 새로운 split이 변수 $X_j$가 $s$의 값을 가질 때 일어난다고 하자. 새 split은 다음과 같은 새로운 partition을 생성한다.
\(R_1(j,s)=\{ X \mid X_j \le s\} \text{ , } R_2(j,s)=\{ X \mid X_j > s\}\) Misclassification error는 해당 partition 내에서 잘못 분류한 observation의 비율로 다음과 같이 나타낼 수 있다.
\[\frac{1}{N_m} \sum_{x_i \in R_m} I(y_i \neq c_m)=1- \frac{1}{N_m} \sum_{x_i \in R_m} I(y_i = c_m)=1-\hat{p_{c_m}}(R_m)\]우리는 새로운 splint 후의 misclassification error의 합을 최소화하는 splitting variable $X_j$와 split point $s$를 찾는다.
\[\min_{j,s} \Big( [1- \hat{p_{c_1}}(R_1)]+[1- \hat{p_{c_2}}(R_2)] \Big)\]지금까지 설명한 CART 알고리즘에는 모든 observation이 같은 가중치로 모형에 반영된다는 것이 깔려있다. CART 알고리즘은 각 observation에 observation weight가 있는 것을 쉽게 반영할 수 있다. CART에서 observation에 대해 수행했던 모든 sum을 weighted sum으로 바꾸면 된다. 이는 다음과 같다.
\[\hat{p_k}(R_m)=\frac{\sum_{x_i \in R_m} w_iI(y_i=k)}{\sum_{x_i \in R_m} w_i} \enspace \text{ , } k=1,\cdots,K\] \[c_m = \underset{k=1,\cdots,K}{\operatorname{argmax}} \hat{p_k}(R_m)\]즉, 각 partition의 classification 결과를 정할 때, weight 값이 큰 observation에 대한 예측이 더 많이 반영되도록 한 것이다. $\hat{p_k}(R_m)$의 식이 바뀌었으므로, 새로운 split을 구하는 과정에서도, weighted sum을 이용한 $\hat{p_k}(R_m)$로 split을 수행한다.
2.(b)~(d) Updating Weights, $\alpha_m$ and $w_i$
Observation weight를 반영해 $G_m(x)$의 학습을 한 후, 해당 weak classifier, $G_m(x)$가 잘못 예측한 error rate인 $\text{err}_m$를 계산한다.
\[\text{err}_m = \frac{\sum_{x_i \in R_m} w_iI(y_i \neq G_m(x_i))}{\sum_{x_i \in R_m} w_i}\]AdaBoost.M1 모형의 학습은 두 가지 weight를 이용하여 이루어진다. 첫 번째는 각 weak classifier, $G_1(x), \cdots, G_M(x)$가 전체의 예측 결과에 얼마나 영향을 끼치는지를 결정하는 model weight, $\alpha_1, \cdots, \alpha_M$이다. 그리고 두 번째는 각 training example들이 $G_m(x)$의 fitting에 얼마나 영향을 끼치는지를 결정하는 observation weight, $w_1, \cdots, w_N$이다. AdaBoost.M1은 $m$번째 iteration에서 $G_m(x)$의 model weight, $\alpha_m$의 값을 결정한다. 그리고 이를 통해, 다음 $m+1$번째 iteration에서 $G_{m+1}(x)$의 학습에 쓰일 observation weight, $w_1, \cdots, w_N$의 값을 업데이트한다.
\[\text{Determine } \alpha_m \text{ : model weight of } m \text{th classifier } G_m(x)\] \[\text{Update } w_1, \cdots, w_N \text{ : updated observation weight for next iteration}\]
Model weight, $\alpha_m$은 $G_m(x)$의 error rate, $\text{err}_m$을 이용하여 다음과 같이 결정된다.
위 식과 같이 model weight $\alpha_m$을 결정하는 것은 어떤 의미가 있을까? $y=\log(\frac{1-x}{x})$의 그래프를 그려보면 그 의미를 알 수 있다. 단, 여기서는 $\text{err}_m$이 $0 \sim \frac{1}{2}$의 값을 가진다는 것을 알아두자. 왜냐하면 error rate은 $0$에서 $1$ 사이의 값을 가지며, weak classifier는 성능이 좋지 않은 classfier를 의미하지만, 그래도 random guessing보다는 낮은 error rate을 가져야 하기 때문이다. $y=\log(\frac{1-x}{x})$의 그래프는 아래와 같다.

- $\text{err}_m$이 $0$에 가까울 수록, 즉 $G_m(x)$의 classification 성능이 좋을 수록, model weight $\alpha_m$는 더 큰 값을 갖는다.
- $\text{err}_m$이 $\frac{1}{2}$에 가까울 수록, 즉 $G_m(x)$의 classification 성능이 떨어질 수록, model weight $\alpha_m$는 더 작은 값을 갖는다.
AdaBoost.M1의 최종 classification은 $G(x)=\text{sign}\Big( \sum_{m=1}^{M} \alpha_m G_m(x) \Big)$로 결정되기 때문에, $G_1(x),\cdots, G_M(x)$ 중 classification 성능이 더 좋았던 weak classifier가 더 큰 값의 $\alpha_m$을 가지므로, 최종 classification에 더 큰 영향을 끼치게 된다.
$m$번째 iteration에서 Observation weight, $w_1, \cdots, w_N$은 다음과 같이 업데이트된다.
이와 같은 observation weight의 업데이트가 어떤 의미를 갖는지는, 다음 두 경우를 나누어 생각해보면 알 수 있다.
- $G_m(x)$가 $i$번째 observation을 올바르게 classify했을 때, 즉 $y_i=G_m(x_i)$일 때, * $I(y_i \neq G_m(x_i))=0$이므로, Observation weight는 다음과 같이 업데이트될 것이다.
- $G_m(x)$가 $i$번째 observation을 잘못 classify했을 때, 즉 $y_i \neq G_m(x_i)$일 때, * $I(y_i \neq G_m(x_i))=1$이므로, Observation weight는 다음과 같이 업데이트될 것이다.
Model weight $\alpha_m$은 항상 양수이므로, $w_i$에 곱해지는 $\exp (\alpha_m)$는 $1$보다 큰 값이 된다. 따라서, $m$번째 iteration에서 Observation weight, $w_i$는 다음과 같이 업데이트 된다.
- $G_m(x)$에 의해 올바르게 classify된 observation에 대해서는, $w_i$가 업데이트 되지 않는다.
- $G_m(x)$에 의해 잘못 classify된 observation에 대해서는, $w_i$가 커지도록 조정된다.
$G_m(x)$에 의해 잘못 classify된 observation은 다음 iteration의 모형 학습($G_{m+1}(x)$)에서 더 높은 우선순위를 갖도록 하고, 올바르게 classify된 observation은 다음 iteration에서 상대적으로 더 낮은 우선순위로 모형의 학습에 기여하도록 조정이 이루어지는 것이다. 따라서 Iteration이 지나감에 따라, 올바르게 classify하기 어려운 관찰치들은 점점 더 높은 observation weight를 가지게 될 것이다. 그렇게 함으로써 그 다음에 이어지는 classifier들의 학습이 해당 관찰치에 더 집중하여 이루어질 수 있게 된다.
3. Combining the Results of Base Learners
최종적으로 얻은 우리의 classification 모형은 다음과 같다.
\[G(x)=\text{sign}\Big( \sum_{m=1}^{M} \alpha_m G_m(x) \Big)\]각 weak classifier의 결과를 model weight $\alpha_m$으로 가중합하여, 그 값이 양수이면 $1$, 음수이면 $-1$을 예측하는 모형이 된다.
The Power of AdaBoost
10.2 Boosting Fits an Additive Model
위의 AdaBoost.M1에서는 동일한 알고리즘을 반복적으로 수행하여 $G_1(x), \cdots, G_M(x)$를 차례로 학습한 뒤, 다음과 같은 형태의 classifier, $G(x)$를 만들었다.
\[G(x)=\text{sign}\Big( \sum_{m=1}^{M} \alpha_m G_m(x) \Big)\]Boosting은 여러 elementary basis function를 합의 형태로 결합한 additive expansion을 학습하는 방법이다. 위의 경우는 각 classifier $G_1(x), \cdots, G_M(x) \in \{ -1,1 \}$이 basis의 역할을 하게 된다. 좀 더 일반적인 표현으로는 basis function expansion을 다음과 같은 형태로 나타낼 수 있다.
\[f(x)=\sum_{m=1}^{M} \beta_m b(x;\gamma_m)\]여기서 $\beta_m, m=1,\cdots,M$ 은 expansion coefficient, 그리고 $b(x;\gamma)$는 parameter $\gamma$로 characterize되는 $x$에 대한 함수이다. Basis expansion은 chapter 5에서 더 자세히 소개하였다. 이와 같은 basis expansion은 많은 통계 모형의 틀이 된다.
- Decision tree에서 parameter $\gamma$는 tree의 split variable와 split point, 그리고 각 terminal node의 prediction을 의미한다.
- Multivariate adaptive regression splines(MARS)는 truncated-power spline basis를 사용하며, parameter $\gamma$는 해당 spline basis의 knot이 위치한 variable과 value를 의미한다.
- Hidden layer가 하나인 neural network, $b(x;\gamma)=\sigma(\gamma_0 + \gamma_1^T x)$, 를 basis function으로 가지며, parameter $\gamma=\{ \gamma_0, \gamma_1 \}$은 input feature의 linear combination들을 characterize한다.
그럼 이와 같이 여러 basis function을 선형결합 형태를 갖는 모형은 어떻게 학습할까? 다음과 같이 training data의 loss 총합을 최소화하는 $\beta_1,\cdots,\beta_M, \gamma_1, \cdots, \gamma_M$을 찾는 방법을 생각해 볼 수 있다.
\[\min_{ \{ \beta_m , \gamma_m \}_1^M } \sum_{i=1}^{N} L \Bigg( y_i, \sum_{m=1}^{M} \beta_m b(x_i;\gamma_m) \Bigg) \enspace \cdots \cdots (a)\]이 때의 loss는 square error, negative log-likelihood 등 상황에 따라 어떤 loss도 올 수 있다. Basis function 역시, $\gamma$에 의해 characterize된다면, 어떠한 형태의 함수도 올 수 있다. 그런데 대부분의 경우, $(a)$ 식과 같이 $M$개의 basis function으로 이루어진 additive expansion에 대한 loss의 합은 직접적으로 최소화하기 굉장히 어렵다. 그런데 만약, $(b)$ 식과 같이 한 basis function에 대한 loss를 최소화하는 것이 손쉽게 가능하다면, additive expansion 형태의 모형에 대한 loss의 합을 간접적으로 최소화할 수 있는 대안이 있다.
\[\min_{ \beta, \gamma } \sum_{i=1}^{N} L ( y_i, \beta b(x_i;\gamma) ) \enspace \cdots \cdots (b)\]그것은 바로 다음 절에서 소개할 forward stagewise additive modeling이다.
10.3 Forward Stagewise Additive Modeling
Forward stagewise additive modeling은 10.2의 $(a)$ 식의 해를 간접적으로 구하는 방법이다. 그 알고리즘은 아래와 같다.

이미 모형에 추가된 basis function의 parameter $\gamma_1, \cdots, \gamma_{m-1}$과 expansion coefficient $\beta_1, \cdots, \beta_{m-1}$를 변화시키지 않고, 새 basis function $\beta_m b(x;\gamma_m)$을 모형에 더하는 작업을 반복적으로($M$번) 수행하여, 10.2 $(a)$ 식에 대한 해를 얻는 방법이다. 이를 통해 얻은 우리의 모형은 아래와 같다.
\[f(x)=\sum_{m=1}^{M} \beta_m b(x;\gamma_m)\]가장 간단한 loss function의 형태인 squared-error loss를 이용해, forward stagewise additive modeling을 수행하는 과정을 생각해보자. 위에서 설명했듯 forward stagewise additive modeling은, additive expansion에 대한 loss를 직접적으로 최소화하는 것이 어려울 때, 단일 basis에 대한 loss를 차례로 최소화하면서, additive expansion 형태를 갖는 모형의 최적 parameter의 해를 간접적으로 찾는 방법이다. squared-error loss의 형태는 아래와 같다.
\[L(y,f(x))=(y-f(x))^2\]Squared-error loss를 사용한 forward stagewise additive modeling의 $m$ 번째 iteration에서 새 basis function parameter $\gamma_m$와 expansion coefficient $\beta_m$을 찾을 때 고려하는 loss는 아래와 같다.
\[\begin{align*} L \Big( y_i, f_{m-1}(x_i)+\beta b(x_i;\gamma) \Big) &= \Big( y_i-f_{m-1}(x_i)-\beta b(x_i;\gamma) \Big)^2\\ &=\Big( r_{im}-\beta b(x_i;\gamma) \Big)^2 \end{align*}\]여기서 $r_{im}=y_i-f_{m-1}(x_i)$는, $i$th observation에 대한, 이전 iteration($m-1$기)까지 학습한 모형의 prediction과 실제 반응변수 관측치 사이의 residual을 의미한다. 따라서, squared-error loss가 loss일 때, forward stagewise additive modeling의 각 iteration은 현재의 residual에 새 basis function를 학습시키는 것이 된다. 이 예시는 Least squares regression boosting에서 사용된다. 다만 squared-error loss는 classification에는 매우 좋지 않은 loss function이며, regression의 경우에도 이상치에 robust하지 못한 성능을 보이므로 다른 loss criteria를 고려할 필요가 있다.
10.4 Exponential Loss and AdaBoost
이 절에서는 10.1에서 소개한 AdaBoost.M1을 exponential loss를 사용한 forward stagewise additive modeling 접근으로 볼 수 있다는 것을 증명한다. Exponential loss는 다음과 같은 식의 loss function이다. Exponential loss가 어떤 특징을 갖는 loss function인지는 다음 절에서 좀 더 자세히 알아볼 것이다.
\[L(y,f(x))=\exp(-yf(x))\]AdaBoost는 $G_m(x) \in \{ -1,1\}, m=1,\cdots, M$를 basis function으로 갖는다. Exponential loss를 loss function으로 갖는 forward stagewise additive modeling은, $m$번째 iteration에서 다음과 같은 방법으로 basis function과 expansion coefficient를 찾는다.
\[\begin{align*} (\beta_m, G_m) &= \text{arg}\min_{\beta,G} \sum_{i=1}^{N} \text{exp}\Big[-y_i \big( f_{m-1}(x_i)+\beta G(x_i) \big) \Big]\\ &=\text{arg}\min_{\beta,G} \sum_{i=1}^{N} \text{exp}\big(-y_i f_{m-1}(x_i) \big)\text{exp} \big( - \beta y_i G(x_i) \big)\\ &=\text{arg}\min_{\beta,G} \sum_{i=1}^{N} w_i^{(m)} \text{exp} \big( - \beta y_i G(x_i) \big) \enspace \cdots \cdots (c) \end{align*}\]여기서 $ w_i^{(m)}= \text{exp}(-y_i f_{m-1}(x_i))$는 $\beta, G$를 포함하지 않고, $m$th iteration에서는 이전 기까지 학습된 모형 $f_{m-1}(x)$의 형태를 완전히 알고 있으므로, 이 최소화 문제에서는 각 observation에 대한 weight, $w_i^{(m)}$로 보아도 무방하다. 이 weight는 각 iteration마다 달라지므로, 첨자 ${ }^{(m)}$을 붙여주었다. 위 최소화 문제에서 $(\beta_m, G_m)$를 찾는 문제는, 먼저 $\beta$가 주어졌다고 가정하고 최적의 $G_m$을 찾은 후, 그 $G_m$에서의 최적 $\beta$ 값인 $\beta_m$을 구하는 방식으로 해결할 것이다. 이와 같은 풀이가 가능한 이유는, $\beta$가 어떤 값을 갖는가에 상관없이, 임의의 $\beta > 0$에 대해 다음이 만족하기 때문이다.
\[G_m=\text{arg}\min_{G} \sum_{i=1}^{N} w_i^{(m)} I(y_i \neq G(x_i)) \enspace \cdots \cdots (d)\]그 이유는 아래와 같다.
\[\begin{align*} \sum_{i=1}^{N} w_i^{(m)} \text{exp} \big( - \beta y_i G(x_i) \big) &= e^{-\beta} \cdot \sum_{y_i = G(x_i)} w_i^{(m)} + e^\beta \cdot \sum_{y_i \neq G(x_i)} w_i^{(m)} \\ &=e^{-\beta} \cdot \sum_{y_i = G(x_i)} w_i^{(m)} + e^{-\beta} \cdot \sum_{y_i \neq G(x_i)} w_i^{(m)} - e^{-\beta} \cdot \sum_{y_i \neq G(x_i)} w_i^{(m)} + e^\beta \cdot \sum_{y_i \neq G(x_i)} w_i^{(m)}\\ &=e^{-\beta} \cdot \sum_{i=1}^{N} w_i^{(m)} + (e^\beta- e^{-\beta}) \cdot \sum_{y_i \neq G(x_i)} w_i^{(m)}\\ &=e^{-\beta} \cdot \sum_{i=1}^{N} w_i^{(m)} + (e^\beta- e^{-\beta}) \cdot \sum_{i=1}^{N} w_i^{(m)} I(y_i \neq G(x_i)) \end{align*}\]첫 번째 등식이 성립하는 이유는 반응변수 $y_i$와 그에 대한 classifier $G(x_i)$는 모두 $-1$ 또는 $1$의 값을 갖기 때문이다. $y_i=G(x_i)$일 때는 $y_iG(x_i)=1$, $y_i \neq G(x_i)$일 때는 $y_iG(x_i)=-1$이 된다. 이를 $(c)$ 식에 대입하면 다음과 같다.
\[\begin{align*} (\beta_m, G_m) &= \text{arg}\min_{\beta,G} \Bigg\{ e^{-\beta} \cdot \sum_{i=1}^{N} w_i^{(m)} + (e^\beta- e^{-\beta}) \cdot \sum_{i=1}^{N} w_i^{(m)} I(y_i \neq G(x_i)) \Bigg\}\\ &= \text{arg}\min_{\beta,G} \Bigg\{ e^{-\beta} \cdot \sum_{i=1}^{N} w_i^{(m)} + (e^\beta- e^{-\beta}) \cdot \sum_{i=1}^{N} w_i^{(m)} I(y_i \neq G(x_i)) \Bigg\} \end{align*}\]$\beta> 0$가 어떤 값을 갖는가에 상관없이, $G_m$은 두 번째 항의 $\sum_{i=1}^{N} w_i^{(m)} I(y_i \neq G(x_i))$를 최소화함으로써 얻어지는 것을 알 수 있다.
\[\therefore \enspace G_m = \text{arg}\min_{G} \sum_{i=1}^{N} w_i^{(m)} I(y_i \neq G(x_i))\]따라서 먼저 $(d)$의 식과 같이 $G_m$을 구한다. 그 다음, $\beta_m$을 구하는 과정은 아래와 같다.
\[\beta_m = \text{arg}\min_{\beta} \Bigg\{ e^{-\beta} \cdot \sum_{i=1}^{N} w_i^{(m)} + (e^\beta- e^{-\beta}) \cdot \sum_{i=1}^{N} w_i^{(m)} I(y_i \neq G_m(x_i)) \Bigg\}\]일계 미분조건에 의하여,
\[-e^{-\beta} \cdot \sum_{i=1}^{N} w_i^{(m)} + (e^\beta+e^{-\beta}) \cdot \sum_{i=1}^{N} w_i^{(m)} I(y_i \neq G_m(x_i))=0\]이를 정리하면 다음과 같다. 여기서 $\text{err}_m$은 AdaBoost.M1에서 정의했던 $\text{err}_m$과 정확히 같은 식이다.
\[(e^\beta+e^{-\beta}) \cdot \text{err}_m=e^{-\beta}, \enspace \text{ where } \enspace \text{err}_m=\frac{\sum_{i=1}^{N} w_i^{(m)} I(y_i \neq G_m(x_i))}{\sum_{i=1}^{N} w_i^{(m)}}\] \[e^\beta \cdot \text{err}_m= e^{-\beta} \cdot (1-\text{err}_m)\] \[\therefore \enspace \beta_m = \frac{1}{2} \log \Big( \frac{1-\text{err}_m}{\text{err}_m}\Big)\]$m$번째 iteration에서의 업데이트는 다음과 같이 이루어진다.
\[f_m(x)=f_{m-1}(x) + \beta_m G_m(x)\]그 다음 iteration인, $m+1$번째 iteration에서는 다음과 같은 observation weight를 가질 것이다.
\[w_i^{(m+1)}= \text{exp}(-y_i f_{m}(x_i))=w_i^{(m)} \cdot \text{exp}(- \beta_m y_i G_m(x_i))\]위에서 설명했듯이, $y_i=G(x_i)$일 때는 $y_iG(x_i)=1$, $y_i \neq G(x_i)$일 때는 $y_iG(x_i)=-1$을 만족한다. 그에 따라, $-y_i G_m(x_i)=2 \cdot I(y_i \neq G_m(x_i))-1$가 만족하게 된다. 이를 weight update 식에 대입하면 다음과 같다.
\[\begin{align*} w_i^{(m+1)}&=w_i^{(m)} \cdot \text{exp}( 2 \beta_m\cdot I(y_i \neq G_m(x_i))-\beta_m)\\ &=w_i^{(m)} \cdot \text{exp}( 2 \beta_m\cdot I(y_i \neq G_m(x_i))) \cdot \text{exp}(-\beta_m)\\ &=w_i^{(m)} \cdot \text{exp}( \alpha_m \cdot I(y_i \neq G_m(x_i))) \cdot \text{exp}(-\beta_m) \end{align*}\]여기서 위 식에서 사용한 것과 같이 $\alpha_m = 2\beta_m = \log ( \frac{1-\text{err}_m}{\text{err}_m})$으로 정의해주고, AdaBoost.M1에서의 observation weight 업데이트와 이를 비교해보자. AdaBoost.M1에서는 observation weight를 업데이트할 때 $\text{exp}(-\beta_m)$을 곱해주지 않았지만, 이는 모든 observation의 index $i$에 대해서는 동일한 값을 갖는 상수이다. 모든 weight를 같은 상수로 곱해주는 것은 weight에 아무런 영향을 끼치지 않으므로, exponential loss를 사용한 forward stagewise additive modeling에서의 observation weight update는 AdaBoost.M1과 동일하다는 것을 확인할 수 있다.
추가로, AdaBoost.M1 알고리즘의 2.(a) step, “Observation weight를 고려하여 weak classifier $G_m(x)$를 학습하시오”는 위와 같은 exponential loss를 사용한 forward stagewise additive modeling에서 어떤 부분과 비교될 수 있을지 생각해보자. 위의 $(d)$식에서는 $G_m$을 다음과 같이 학습하였다.
\[G_m=\text{arg}\min_{G} \sum_{i=1}^{N} w_i^{(m)} I(y_i \neq G(x_i))\]이는 observation weight, $w_1^{(m)}, \cdots ,w_N^{(m)}$로 misspecification indicator를 가중합한 것을 최소화하는 함수 $G$를 찾은 것이므로, observation weight를 고려하여 weak classifier $G_m(x)$를 학습한 것이라고 볼 수 있다. 따라서, 이 절은 다음과 같은 결론에 도달한다.
- AdaBoost.M1을 수행하는 것은 forward stagewise additive modeling 하에서 exponential loss criterion을 최소화한 것과 같다.
10.5 Why Exponential Loss?
AdaBoost.M1을 exponential loss에 기반한 forward stagewise additive modeling으로 볼 수 있다는 것을 소개하였다. 여기서는 exponential loss의 성질에 대해 좀 더 알아보고자 한다. 먼저 additive modeling 관점에서 exponential loss가 갖는 이점은 계산적인 측면을 들 수 있다. exponential loss를 사용하면 위에서와 같이 weight를 업데이트하는 AdaBoost 알고리즘으로 additive modeling을 달성할 수 있다는 것이다.
What does it estimate?
그렇다면 additive modeling에서 exponential loss를 최소화하는 것은 어떤 의미가 있을까? Exponential loss를 최소화하는 것은 무엇을 추정하는 문제일까? 이는 exponential loss의 population minimizer를 고려해보면 쉽게 보일 수 있다 (Friedman et al., 2000). 단 여기서는 binary classification 상황 하에서 논의를 전개한다.
\[\begin{align*} f^{\ast}(x) &= \text{arg} \min_{f(x)} \text{E}_{Y \mid x} (e^{-Yf(x)}) \\ &=\text{arg} \min_{f(x)} P(Y=1 \mid x)\cdot e^{-f(x)} + P(Y=-1 \mid x) \cdot e^{f(x)} \\ \end{align*}\]이를 $f(x)$에 대해 미분하여 최소화하면 다음과 같다.
\[\frac{\partial}{\partial f(x)} \text{E}_{Y \mid x} (e^{-Yf(x)}) = -P(Y=1 \mid x)\cdot e^{-f(x)} + P(Y=-1 \mid x) \cdot e^{f(x)} = 0\] \[P(Y=1 \mid x)\cdot e^{-f(x)} = P(Y=-1 \mid x) \cdot e^{f(x)}\] \[\log P(Y=1 \mid x) -f(x) = \log P(Y=-1 \mid x) + f(x)\] \[\therefore \enspace\enspace f^{\ast}(x) = \text{arg} \min_{f(x)} \text{E}_{Y \mid x} (e^{-Yf(x)})=\frac{1}{2} \log\frac{P(Y=1 \mid x)}{1-P(Y=1 \mid x)}\]따라서, additive modeling에서 exponential loss를 최소화하는 것은 $P(Y=1 \mid x)$의 log-odds$\times \frac{1}{2}$를 추정하는 것과 같음을 알 수 있다. 이는 어떤 의미가 있을까? AdaBoost.M1 알고리즘을 수행하는 것은 forward stagewise additive modeling 하에서 exponential loss를 최소화하는 것과 같다는 것을 보였다. 또한, 위의 AdaBoost.M1에서는 추정된 함수의 부호를 이용해 classification을 수행하였다.
\[G(x)=\text{sign}\Big( \sum_{m=1}^{M} \alpha_m G_m(x) \Big)\]exponential loss를 최소화하여 얻은 $\hat{f} (x)$는 $P(Y=1 \mid x)$의 log-odds$\times \frac{1}{2}$를 추정한 것이기 때문에, 그 부호를 이용하여 classification을 수행하는 것이 왜 타당한지를 뒷받침한다.
Binomial negative log-likelihood (binomial deviance)
또 하나의 사실은 binomial negative log-likelihood의 population minimizer가 exponential loss의 population minimizer와 같다는 것이다. 이에 대해서 간단히 살펴보자. 먼저 $Y \in {1,-1 }$에 대해, $Yf(x)$가 unnormalized log-probability, $\log \tilde{p}(x)=\log \tilde{P}(Y=1 \mid x)$를 나타내는 것으로 두면, $p(x)=P(Y=1 \mid x)$는 다음과 같이 나타낼 수 있다.
\[\log \tilde{P}(Y \mid x)=Yf(x)\] \[\tilde{P}(Y \mid x)=e^{Yf(x)} \enspace , \enspace Y \in \{ -1,1 \}\] \[P(Y \mid x)=\frac{\tilde{P}(Y \mid x)}{e^{-f(x)}+e^{f(x)}}=\frac{e^{Yf(x)}}{e^{-f(x)}+e^{f(x)}} \enspace , \enspace Y \in \{ -1,1 \}\] \[p(x)=P(Y=1 \mid x)=\frac{e^{f(x)}}{e^{-f(x)}+e^{f(x)}}=\frac{1}{1+e^{-2f(x)}}\]Binomial 분포를 따르는 확률변수의 likelihood 식을 이용하기 위해 $Y \in {1,-1 }$의 classification 문제를 $Y’ = (Y+1)/2 \in { 1,0}$의 문제로 변환하면, binomial log-likelihood는 다음과 같다.
\[\begin{align*} \text{Binomial log-likelihood}&=Y' \log p(x) + (1-Y')\log (1-p(x))\\ &=Y' \Big[-\log (1+e^{-2f(x)}) \Big] + ( 1-Y' ) \Big[ -2f(x)-\log (1+e^{-2f(x)})\Big]\\ &=\frac{Y+1}{2} \Big[-\log (1+e^{-2f(x)}) \Big] + \Big( 1-\frac{Y+1}{2} \Big) \Big[ -2f(x)-\log (1+e^{-2f(x)})\Big]\\ &=-2f(x)\Big( \frac{1-Y}{2} \Big)-\log (1+e^{-2f(x)})\\ &=\begin{cases} -\log (1+e^{-2f(x)}) &\quad\text{if} \enspace Y=1\\ -\log (1+e^{2f(x)}) &\quad\text{if} \enspace Y=-1\\ \end{cases} \\ &= -\log (1+e^{-2Yf(x)})\\ \end{align*}\]Binomial negative log-likelihood는 다음과 같은 식으로 나타낼 수 있다.
\[\text{Negative binomial log-likelihood} = \ell(Y,f(x))=\log (1+e^{-2Yf(x)})\]likelihood의 population maximizer는 true probability $p(x)=P(Y=1 \mid x)$이므로, negative log-likelihood의 minimizer 역시 $p(x)$가 된다. $p(x)=1/{(1+e^{-2f(x)})}$ 식을 변형하면, negative binomial log-likelihood를 최소화하는 $f(x)$의 형태를 얻게 된다.
\[f(x) = \frac{1}{2} \log\frac{p(x)}{1-p(x)}\]이는 log-odds$\times \frac{1}{2}$이며, exponential loss를 최소화하는 $f(x)$와 같다는 것을 알 수 있다. 이진 분류에서의 exponential loss는 log-likelihood가 아님에도 불구하고, population level에서는 binomial negative log-likelihood과 같은 solution을 갖는 것이다.
10.6 Loss Functions and Robustness
이 section에서는 classification과 regression의 여러 loss function에 대해 살펴보고, 각 loss function이 극단치에 대해 얼마나 robust한 지를 비교하고자 한다.
Margin :$\enspace yf(x)$
Regression에서는 실제 observation과 model의 fitted value 간 차이를 $y-f(x)$, 즉 residual이라고 하고, fit이 실제 observation의 값과 가까울 수록 residual은 작은 값을 갖는다. 그래서 대부분의 loss function은 이 residual이 작을 수록 더 작은 값을 갖는 함수가 된다. ${ -1,1 }$을 response로 갖는 classification에서는 $yf(x)$, 즉 “margin”이 그와 같은 역할을 한다.
- 실제 $y$ 값이 $-1$인 상황을 생각해보자. 만약 우리의 fitted value가 $-1$, 즉 정확히 $y$를 예측했다면 margin의 값은 $yf(x)=1>0$이 될 것이다.
- 만약 우리의 fitted value가 $0.7$, 즉 오답인 $1$에 가까운 값을 갖는다면 margin은 $yf(x)=-0.7 < 0$ 로 음수의 값을 가질 것이다.
- 마지막으로, 만약 fitted value가 $-3$의 값을 갖는 경우를 생각해보자. 이는 ${ -1,1 }$를 분류하는 상황에서 강한 certainty로 $-1$을 예측하는 것이 된다. 이 때의 margin은 $yf(x)=3>0$이 된다.
따라서 margin은 0을 기준으로 더 큰 양수의 값을 가질 수록 해당 observation에 대해 모형 적합이 잘 수행되었다는 것을 의미한다.
Robust loss functions for classification
Margin의 개념을 적용하면, classification algorithm은 각 observation에 대한 margin이 최대한 자주 양수의 값을 갖도록 하는 것으로 이해할 수 있다. 10.5에서 보았던 exponential loss와 binomial deviance(negative binomial log-likelihood)는 margin에 대한 감소함수임을 알 수 있다.
\[\text{Exponential loss} = \ell_1(Y,f(x))=e^{-Yf(x)}\] \[\text{Binomial deviance loss} = \ell_2(Y,f(x))=\log (1+e^{-2Yf(x)})\]즉, 특정 observation에서 loss를 최소화하는 것은 margin을 최대화하는 것과 같다. Classification을 위한 이 두 loss 이외의 다른 loss function들 역시 margin $yf(x)$가 음수의 값을 가질 수록 더 큰 loss의 값을 반환할 것이다.

위 그림은 binary classification에 대한 여러 loss들을 margin에 대한 함수로 보고, loss들 간 비교를 위해 $(0,1)$ 점을 지나도록 scaling하여 그린 그림이다. 그림 상에 나타난 loss들은 아래와 같다.
- Misclassification loss $=I(sign(f)\neq y)$
- Exponential loss $=\exp(-yf)$
- Binomial deviance loss $=\log(1+\exp(-2yf))$
- Squared error loss $=(y-f)^2$
- Support vector loss $=(1-yf)_+$
Exponential loss, binomial deviance loss, support vector loss는 misclassification loss를 monotone continuous 함수로 근사한 것으로 볼 수 있다. 또한 이 세 loss는 margin이 더 큰 절대값의 negative value를 가질 수록 더 큰 loss, 벌점을 부여하는 것으로 볼 수 있다.
10.5에서 우리는 binomial deviance loss와 exponential loss가 population level에서는 같은 minimizer를 갖는다는 것을 확인했다. 하지만 finite sample의 실제 분석 상황에서는 두 loss가 다른 양상을 보인다. 눈여겨볼 점은 binomial deviance는 margin이 음수 방향으로 커짐에 따라 linear한 속도로 loss를 늘리는 데 반해, exponential loss는 loss 증가의 속도가 더 빠르다는 것이다. 이처럼 negative margin에 대해 더 큰 loss를 부여하는 특성 때문에 exponential loss, 그리고 exponential loss를 사용하는 AdaBoost.M1은 상대적으로 덜 robust하여, 극단치가 많거나 noise가 있는 data에 적용되었을 때 그 성능이 저하되는 것으로 알려져 있다.
위 그림에는 squared error loss도 나타나 있는데, classification에 squared loss를 사용하는 것이 부적절하다는 것을 위 그림을 통해 쉽게 확인할 수 있다. 그림을 보면 Margin이 1보다 작은 값을 가질 때는 squared loss가 감소함수이지만, 1보다 큰 margin에 대해서는 증가함수라는 것을 알 수 있다. 즉 더 강한 certainty로 옳은 예측이 수행된 observation에 되려 더 큰 loss를 부과해버리는 것이다. 따라서 squared error loss는 classification에는 적합하지 않은 loss criterion이다.
Robust loss functions for regression
위에서 음수방향으로 극단적인 margin에 대한 binomial deviance loss와 exponential loss의 loss 증가 속도를 비교했듯이, regression의 상황에서는 squared error loss와 absolute error loss를 비교해볼 수 있다.

위 그림은 regression에 대한 세 loss를 residual, $y-f$에 대한 함수로 그린 그림이다.
- Squared error loss $ =(y-f)^2$
- Absolute error loss $ = \mid y-f \text{ }\mid$
- Huber loss $ = (y-f)^2 \enspace \text{if } \enspace \mid y-f\mid < \delta \text{ , } \enspace 2 \delta \mid y-f \mid-\delta ^2 \enspace \text{ otherwise}$
Population level에서는 squared error loss의 minimizer는 $f(x)=\text{E}[Y \mid x]$, absolute error loss의 minimizer는 $f(x)=median(Y \mid x)$이다. 따라서 symmetric한 error distribution의 상황 하에서는 두 loss가 같은 minimizer를 갖는다. 하지만 위에서의 논의와 마찬가지로, finite sample의 상황 하에서 squared error loss는 absolute error loss보다 큰 residual에 더 큰 영향을 받게 된다. 이는 residual이 $0$에서 멀어짐에 따라 Absolute error loss가 linear하게 loss 값을 증가시키는 반면, squared error loss는 quadratic하게 loss를 더 크게 증가시키는 것으로 확인할 수 있다. 따라서 극단치가 존재하거나 error distribution이 heavy-tailed distribution인 상황에서, 상대적으로 덜 robust한 squared error loss를 사용한 모형의 성능은 저하되는 경향이 있다.
이 두 loss를 합쳐 residual이 0으로부터 $\delta$ 거리 안에 있을 때는 squared error loss를, 그 밖의 residual에 대해서는 linear한 loss를 적용한 loss function이 Huber loss이다.
Summary
따라서 robustness가 중요한 상황에서는 exponential loss(classification)이나 squared error loss(regression)이 최고의 criteria가 되지 못한다. 하지만 forward stagewise additive modeling의 모형에서는 두 loss가 boosting의 식과 과정을 매우 간결하게 만들어준다는 장점이 있다.
- Exponential loss을 이용한 forward stagewise additive model의 학습의 경우, AdaBoost.M1를 수행하는 것과 같다는 것을 위에서 보였다.
- squared error loss를 이용한 forward stagewise additive model 학습의 각 step은, 이전 step까지의 residual $y-f_{m-1}(x)$에 base learner를 학습하는 것이 된다.
- Binomial deviance나 absolute error loss, Huber loss와 같이 robust한 loss function을 이용한 forward stagewise additive model의 학습은 위 두 경우처럼 간단한 알고리즘이 되지 않는다.
그러나 이후의 section, 10.10에서 우리는 임의의 미분가능한 loss에 대해서도 간단한 알고리즘으로 학습할 수 있는 boosting, Gradient boosting에 대해 살펴볼 것이다.
10.7 “Off-the-Shelf” Procedures for Data Mining
skip
10.8 Example: Spam Data
skip
10.9 Boosting Trees
Decision Tree
Decision tree는 예측변수들이 이루는 공간을 disjoint한 region, $R_j, j=1,2, \cdots, J$로 나누고, 이를 tree의 terminal node로 부른다. 그리고 각 region $R_j$에 상수 $\gamma_j$가 부여되어, 다음과 같은 방식으로 prediction을 수행한다.
\[x \in R_j \Rightarrow f(x)=\gamma_j\]따라서, decision tree는 다음과 같은 식으로 나타낼 수 있다.
\[T(x : \Theta)=\sum_{j=1}^{J} \gamma_j I(x \in R_j)\]여기서 model의 parameter, $\Theta$는 $J$개의 region, $R_1 , \cdots , R_J$와 각 region의 value, $\gamma_1 , \cdots , \gamma_J$를 의미한다.
\[\Theta=\{ R_j , \gamma_j \}^{J}_{j=1}\]따라서 주어진 training data하에서, tree의 학습은 다음 empirical risk를 최소화하는 $\Theta$를 찾는 문제를 해결함으로써 이루어진다.
\[\hat{\Theta} = \text{arg} \min_\Theta \sum_{j=1}^{J} \sum_{x_i \in R_j} L(y_i, \gamma_j)\]이 최적화 문제를 직접적으로 해결하는 것은 매우 어려운 일이므로, 우리는 다음과 같이 최적화 문제를 둘로 나누어, 간접적으로 최적의 해를 구하고자 한다.
- Finding $\gamma_j$ given $R_j$ : regression의 경우는 주로 $R_j$ 내의 observation들의 $y$값의 평균을 $\hat{\gamma}_j$로 둔다. Misclassification loss를 사용하는 classification의 경우, $R_j$ 내의 observation들 중 가장 많이 나온 class(modal class)를 $\hat{\gamma}_j$로 둔다.
- Finding $R_j$ : Region을 나누는 일반적인 방법은 greedy, top-down의 반복적인 partitioning을 수행하는 것이다. Classification tree의 경우, misclassification error는 node impurity를 반영하지 못하고 잘못 분류된 observation의 count만 반영하기 때문에, gini index나 cross-entropy를 사용하여 node split을 정한다.
Boosted Tree Model
Boosted tree model은 이러한 tree를 base learner로 둔 boosting model이며, section 10.3에서 소개한 것과 같은 forward stagewise 알고리즘을 이용해 학습을 수행한다.
\[f_M(x)=\sum_{m=1}^{M} T(x; \Theta_m)=T(x; \Theta_1)+ \cdots + T(x; \Theta_M)\]Forward stagewise 학습 과정의 $m$번째 step에서 우리는 다음과 같은 최적화 문제를 해결한다. $f_{m-1}(x)$는 이전 step까지 학습된 forward stagewise additive model, 즉 $1,\cdots , m-1$번째 base learner의 합을 의미한다.
\[f_{m-1}(x)=T(x; \hat{\Theta}_1)+ \cdots + T(x; \hat{\Theta}_{m-1})\] \[\hat{\Theta}_m = \{ R_{jm}, \gamma_{jm} \}_{j=1}^{J_m}= \text{arg} \min_{\Theta_m} \sum_{n=1}^{N} L\Big( y_i, f_{m-1}(x_i)+T(x_i;\Theta_m)\Big)\]Boosted tree model의 각 step의 tree를 학습하는 것은 하나의 단일 tree 모형을 학습하는 것보다 더 어려운 최적화 문제가 된다. 다만 section 10.5의 summary에서 언급했듯이, squared error loss나 exponential loss는 boosted model의 각 step에서의 최적화 문제를 매우 간단하게 만든다.
Example: Boosted Regression Tree Model - Squared Error Loss
먼저 squared error loss의 경우를 살펴보자. Squared error loss를 우리의 loss function으로 선택했을 때 boosted tree model의 각 step의 최적화 문제는 아래와 같다.
\[\begin{align*} \hat{\Theta}_m &= \text{arg} \min_{\Theta_m} \sum_{n=1}^{N} L\Big( y_i, f_{m-1}(x_i)+T(x_i;\Theta_m)\Big)\\ &= \text{arg} \min_{\Theta_m} \sum_{n=1}^{N} \Big( y_i - \{ f_{m-1}(x_i)+T(x_i;\Theta_m) \} \Big)^2 \\ &= \text{arg} \min_{\Theta_m} \sum_{n=1}^{N} \Big( \{ y_i - f_{m-1}(x_i) \} - T(x_i;\Theta_m)\Big)^2 \\ &= \text{arg} \min_{\Theta_m} \sum_{n=1}^{N} L\Big( y_i - f_{m-1}(x_i), T(x_i;\Theta_m)\Big)^2 \\ \end{align*}\]즉, squared error loss를 사용했을 때 forward stagewise procedure의 각 step은, 직전 step 까지의 residual을 가장 잘 설명하는 하나의 decision tree를 학습하는 문제를 해결하는 것과 같다.
Example: Boosted Classification Tree Model - Exponential Loss
Binary classification 상황에서 exponential loss를 사용하는 경우를 살펴보자. 우리의 response variable은 앞에서의 논의와 같이 ${ -1,1 }$의 값을 갖는다고 하자.
\[\begin{align*} \hat{\Theta}_m &= \text{arg} \min_{\Theta_m} \sum_{n=1}^{N} L\Big( y_i, f_{m-1}(x_i)+T(x_i;\Theta_m)\Big)\\ &= \text{arg} \min_{\Theta_m} \sum_{n=1}^{N} \exp\Big( -y_i\{ f_{m-1}(x_i)+T(x_i;\Theta_m) \} \Big) \\ &= \text{arg} \min_{\Theta_m} \sum_{n=1}^{N} \exp\Big( -y_i f_{m-1}(x_i)\Big) \exp\Big(-y_i T(x_i;\Theta_m) \Big) \\ &= \text{arg} \min_{\Theta_m} \sum_{n=1}^{N} w_i^{(m)} \exp\Big(-y_i T(x_i;\Theta_m) \Big) \\ \end{align*}\]각 base learner가 scaled classification tree, 즉 서로 다른 coefficient를 곱한 basis expansion 형태로 모형에 더해진다고 가정하면, 우리는 이 문제가 AdaBoost.M1과 같다는 것을 section 10.4에서 확인하였다. 이와 같은 가정이 없더라도 boosted classification tree model은 여전히 새 tree $T(x;\Theta_m)$에 대한 weighted exponential criterion으로 간단해진다.
\[\begin{align*} \hat{\Theta}_m &= \text{arg} \min_{\Theta_m} \sum_{n=1}^{N} w_i^{(m)} \exp\Big(-y_i T(x_i;\Theta_m) \Big) \\ &= \text{arg} \min_{\Theta_m} \sum_{j=1}^{J_m} \sum_{x_i \in R_{jm}} w_i^{(m)} \exp(-y_i \gamma_{jm} ) \\ \end{align*}\]하나의 decision tree를 학습할 때와 마찬가지로, 이 weighted exponential loss, $w_i^{(m)} \exp(-y_i \gamma_{jm} )$를 region split의 기준으로 사용하여, $J_m$개의 region, $R_{jm}, j=1, \cdots , J_m$을 얻을 수 있다. 또한, $R_{jm}, j=1, \cdots , J_m$이 주어졌을 때 $\gamma_{jm}$을 구하는 과정은 아래와 같다. 최소화를 위해 first-order condition을 적용하면,
\[\begin{align*} \frac{\partial}{\partial \gamma_{km}} \Big[ \sum_{j=1}^{J_m} \sum_{x_i \in R_{jm}} w_i^{(m)} \exp(-y_i \gamma_{jm} ) \Big]&= - \sum_{x_i \in R_{km}} y_i w_i^{(m)} \exp (-y_i \gamma_{km} ) \\ &= - \sum_{x_i \in R_{km}} w_i^{(m)} \Big( \exp (- \gamma_{km})I(y_i=1) - \exp ( \gamma_{km}) I(y_i=-1)\Big)\\ &=0\\ \end{align*}\]이를 정리하여 $R_{jm}, j=1, \cdots , J_m$이 주어졌을 때, 위의 weighted exponential criterion을 최소화하는 $\gamma_{jm}$의 식을 구하면 다음과 같다. \(\sum_{x_i \in R_{km}} w_i^{(m)} \Big( \exp (- \gamma_{km})I(y_i=1) \Big) = \sum_{x_i \in R_{km}} w_i^{(m)} \Big(\exp ( \gamma_{km}) I(y_i=-1)\Big)\)
\[\exp (2 \gamma_{km}) = \frac{\sum_{x_i \in R_{km}} w_i^{(m)} I(y_i=1)}{\sum_{x_i \in R_{km}} w_i^{(m)} I(y_i=-1)}\] \[\therefore \enspace \enspace \hat{\gamma}_{km}=\frac{1}{2} \log{\frac{\sum_{x_i \in R_{km}} w_i^{(m)} I(y_i=1)}{\sum_{x_i \in R_{km}} w_i^{(m)} I(y_i=-1)} } \enspace \text{ , } \enspace k=1,\cdots , J_m\]Summary
Boosted tree model은 tree를 base learner로 둔 boosting model이며, squared error loss나 exponential loss를 loss function으로 설정했을 때는 forward stagewise 방법으로 그 최적화 문제가 간단하게 해결된다. 그러나 section 10.5에서 확인했듯이 이 두 loss는 robust하지 못하다는 단점이 있다. binomial deviance, Huber loss 등과 같은 robust loss function들은 boosted tree model을 robust해줄 수 있지만, 위 두 예시와 같이 간단하고 빠른 boosting 알고리즘을 얻을 수 없다는 한계가 있다.
10.10 Numerical Optimization via Gradient Boosting
이 section에서는 임의의 differentiable loss function에 대해, 아래와 같은 forward stagewise procedure의 최적화 문제를 해결하는 알고리즘, Gradient Boosting을 소개한다.
\[\hat{\Theta}_m = \text{arg} \min_{\Theta_m} \sum_{n=1}^{N} L\Big( y_i, f_{m-1}(x_i)+T(x_i;\Theta_m)\Big)\]Gradient boosting을 소개하기에 앞서, 그 배경이 되는 numerical optimization의 내용에 대해 간단히 소개하고자 한다. Response variable, $y$를 예측하기 위해 $f(x)$를 사용했을 때의 empirical risk는 아래와 같다.
\[L(f)=\sum_{i=1}^{N} L(y_i, f(x_i))\]목표는 $L(f)$를 최소화하는 $f$를 찾는 것이고, 우리는 가능한 $f$를 tree들의 합으로 한정한 상황이다. 이와 같은 함수 class의 제약이 없는 일반적인 경우 우리의 최적화 문제는 아래와 같다.
\[\hat{\mathbf{f}}=\text{arg} \min_\mathbf{f} L(\mathbf{f})\] \[\text{where } \enspace \mathbf{f}=\{ f(x_1) , \cdots , f(x_N)\} \in \mathbb{R}^N\]Steepest Descent
Numerical optimization 방법들은 $\hat{\mathbf{f}}$를 아래와 같이 여러 iteration에서의 guess들($\mathbf{h}_m$)의 합으로 간접적으로 구할 것이다.
\[\mathbf{f}_M = \sum_{m=0}^{M} \mathbf{h}_m \enspace \text{,} \enspace \mathbf{h}_m \in \mathbb{R}^N\]여기서 $\mathbf f_{0}=\mathbf h_{0}$은 initial guess를 의미하고, $\mathbf f_{m}$은 이전 iteration까지의 guess, $\mathbf f_{m-1}$를 바탕으로 새 guess $\mathbf h_{m}$을 결정하는 방식으로 update된다. 이 guess를 어떻게 결정하는지에 따라 다양한 numerical optimization 방법이 있다. Steepest descent 방법은 아래와 같은 방법으로 새 guess $\mathbf h_{m}$를 결정한다.
\[\mathbf{h}_m = -\rho_m \mathbf{g}_m\] \[\text{where }\enspace \mathbf{g}_m = \Big[ \nabla L(\mathbf{f}) \Big]_{\mathbf{f}=\mathbf{f}_{m-1}} \text{,} \enspace \enspace \rho_m= \text{arg}\min_\rho L(\mathbf{f}_{m-1}-\rho \mathbf{g}_m)\]어떤 점에서의 Gradient는 그 점에서 함수가 가장 가파르게 증가하는 방향을 가리키는 벡터이므로, negative gradient인 $- \mathbf g_{m} $은 이전 step까지의 예측 결과인 $\mathbf{f}=\mathbf f_{m-1}$에서 $L(\mathbf{f})$가 가장 가파르게 감소하는 방향을 나타낸다. 또한, $\rho_m$은 $-\mathbf g_m$ 방향으로 움직였을 때 가장 $L(\mathbf{f})$가 크게 감소하는 step length를 의미한다.
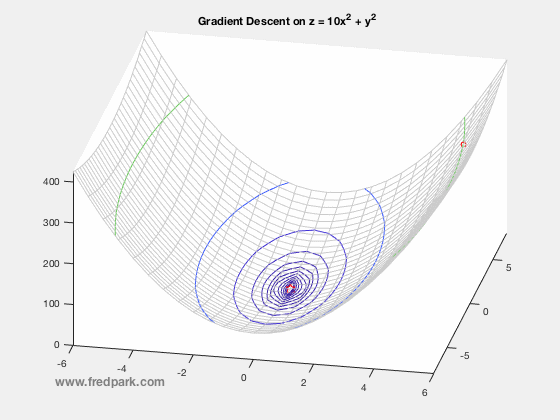
(이미지 출처: http://www.fredpark.com/blog/gradient-descent)
Gradient Boosting
Forward stagewise boosting 역시 steepest descent와 같이 greedy한, 즉 순간순간의 최적화(local optimum)를 통해 전체의 최적화(global optimum)를 수행하고자 하는 방법이다.
\[\begin{align*} \text{Forward stagewise boosting: }\enspace f_M(x)&=\sum_{m=1}^{M} T(x; \Theta_m)=T(x; \Theta_1)+ \cdots + T(x; \Theta_M)\\ \hat{\Theta}_m &= \text{arg} \min_{\Theta_m} \sum_{n=1}^{N} L\Big( y_i, f_{m-1}(x_i)+T(x_i;\Theta_m)\Big)\\ \end{align*}\] \[\text{Steepest descent: }\enspace \mathbf{f}_M = \sum_{m=0}^{M} \mathbf{h}_m = \mathbf{h}_0 + \cdots + \mathbf{h}_M \enspace \enspace\]Boosted tree model의 $m$번째 step에서 만들어진 tree, $T(x;\Theta_m)$은 직전 step까지 만들어진 $f_{m-1}(x)$에 대해 위 criterion을 최소화시키는 tree이다. 이는 empirical risk $L(\mathbf{f})$를 $\mathbf{f}=\mathbf{f}_{m-1}$에서 가장 가파르게 감소시키는 방향인 $-\mathbf{g}_m$와 유사한 기능을 한다. 다만 차이점은 $T(x_1;\Theta_m),\cdots,T(x_N;\Theta_m)$의 값은 서로 독립이 아니고 하나의 tree $T(x;\Theta_m)$에서 얻어진 prediction이라는 제약이 있는데 반해, negative gradient의 component는 각 coordinate의 unconstrained maximal descent direction이라는 점이다.
만약 우리의 목표가 “empirical risk $L(\mathbf{f})$를 줄이는 것”이었다면 steepest descent를 사용하여 최적의 $\mathbf{f}={ f(x_1) , \cdots , f(x_N)}$를 구하면 된다. 이렇게 하면 주어진 $N$개의 training point에서의 empirical risk를 최소화하는 함수 $f$를 얻을 수 있다. 그러나 우리의 목적은 training data를 이용하여 “training data에 나타나지 않은 새 data에 대해서도 $y$에 대해 좋은 예측을 수행하는 모형을 만드는 것”이다. 따라서 우리는 위에서 소개한 steepest descent의 아이디어를 이용하여, forward stagewise boosting의 각 step에서 “$N$개의 training point에 대해, negative gradient $-\mathbf{g}_m$와 가장 비슷한 예측을 수행하는 tree $T(x;\Theta_m)$를 선택”할 것이다. 이것이 바로 gradient boosting의 아이디어이다.
이제 boosted tree model의 각 step에서의 우리의 최적화 문제는 아래와 같다.
\[\begin{align*} \tilde{\Theta}_m &= \text{arg} \min_{\Theta_m} \left\Vert -\mathbf{g}_m-\mathbf{t}_m \right\Vert^2_2 \\ &= \text{arg} \min_{\Theta_m} \sum_{i=1}^{N} (-g_{im}-T(x_i;\Theta_m))^2 \end{align*}\] \[\begin{align*} \text{where }\enspace g_{im}&= i\text{th coordinate of }\mathbf{g}_m =\left[ \frac{\partial L(\mathbf{f})}{\partial f(x_i)} \right]_{f(x_i)=f_{m-1}(x_i)}\\ &=\left[ \frac{\partial }{\partial f(x_i)} \sum_{k=1}^{N} L(y_k, f(x_k)) \right]_{f(x_i)=f_{m-1}(x_i)} =\left[ \frac{\partial L(y_i,f(x_i))}{\partial f(x_i)} \right]_{f(x_i)=f_{m-1}(x_i)}\\ \enspace \\ \mathbf{t}_m &= \begin{bmatrix} \ T(x_1;\Theta_m) \\ \ \vdots \\ \ T(x_N;\Theta_m) \\ \end{bmatrix} = \text{a vector of predicted values at training points} \end{align*}\]…
10.11 Right-Sized Trees for Boosting
10.12 Regularization
10.13 Interpretation
10.14 Illustrations
Reference
Hastie, T., Tibshirani, R.,, Friedman, J. (2001). The Elements of Statistical Learning. New York, NY, USA: Springer New York Inc..
Friedman, J. H. (2001). Greedy function approximation: a gradient boosting machine. Annals of statistics, 1189-1232.